Ceramic Materials for Beginners: What Do You Need?
You do not need every tool when starting ceramics. Choose your technique and essential materials first to protect your budget and make learning easier.
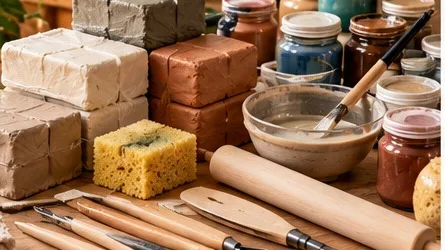
When you begin making ceramics, you do not need to buy every tool at once. First decide which technique you want to use, then choose the essential materials. This will protect your budget and make the learning process easier.
1. Ceramic clay
Your choice of clay depends on the piece you plan to make and the firing range of the kiln available to you. Terracotta, stoneware, and porcelain have different properties. According to Potclays’ comparison, low-firing earthenware clays are soft and easy to shape; stoneware is fired at higher temperatures to create a denser, more durable body; porcelain is fired at the highest temperatures and is less forgiving of uneven drying and differences in thickness.
When starting out, it may be practical to work with an easy-to-shape clay recommended by your local studio. The clay must be compatible with the kiln’s firing program.
2. Essential shaping tools
A beginner’s set may include wooden modeling tools, a plastic or metal rib, a cutting wire, small scrapers, and a simple needle tool. These tools help smooth surfaces, remove excess clay, and create lines and textures. A few versatile tools are enough to begin with, rather than a large collection of specialized ones.
3. Sponge, water, and work surface
A sponge is used to smooth the surface with control and manage moisture. A small container of water, an easy-to-clean work surface, and a suitable board for moving the clay are also useful. Because too much water can weaken the clay, moisten the surface a little at a time.
4. Materials for joining
The surfaces of pieces to be joined are usually scored and bonded with clay slip of a suitable consistency. This slip is generally made from the same clay. The Pottery Wheel notes that even a fork is enough to score the surfaces and recommends this “score and slip” method for beginners. To strengthen the joins and reduce cracking, make sure the pieces have compatible moisture levels and consistency.
5. Glazes and decorating materials
Glazes, slips, and ceramic paints add color and pattern to the surface. However, you should not assume that all products can be used within the same temperature range. For your first projects, choose products used by your studio and known to be compatible with your clay. Suitability for food contact should be checked separately.
6. Ceramic kiln and firing
Proper kiln firing is required to produce true ceramics. You do not need to buy a kiln when starting out; using a ceramic studio’s firing service may be more economical. Follow the recommended temperature range for the clay and glaze, and have an experienced person determine the firing program.
Sample beginner’s shopping list
At first, a small amount of suitable ceramic clay, a few essential shaping tools, a sponge, a water container, and a work board may be enough. Before buying materials for glazing and firing, ask a studio which ones they accept. This will reduce the risk of purchasing incompatible clay or glaze.
Material safety
Take care not to inhale dry clay or glaze dust. Instead of dry sweeping, which sends dust into the air, use suitable wet-cleaning methods. Australia’s Asbestos and Silica Safety and Eradication Agency also notes that dry clay dust and powdered glazes may contain high levels of silica. It recommends wet mopping instead of dry sweeping and adding dry materials to water before mixing. Choose a workspace separate from food preparation areas and read the safety instructions for every material you use.
To see how these materials are used, visit our guide to ceramic shaping techniques. When buying handmade ceramics, you can ask the maker about the clay used and whether the glaze is food-safe. Tospika is not involved in the sales or payment process and does not charge commission.
Frequently asked questions
- Which clay is best for beginners?
- A clay recommended by your studio that suits your shaping method and the firing range of the kiln you can access is a good start.
- Do I need a ceramics starter kit?
- No. You can begin with a few basic tools and add more as you learn new techniques.
- What if I do not have a kiln at home?
- Shape your work at home and arrange drying and firing with a ceramics studio. Ask in advance which clay they accept.
- Is porcelain suitable for beginners?
- It is usually challenging. Porcelain fires at high temperatures and is more sensitive to uneven drying and wall thickness, so an easier clay is often better at first.
- Is ceramic dust dangerous?
- Dry clay and glaze dust can contain silica. Use wet cleaning instead of dry sweeping and follow the safety information for each material.
Sources
- How to Choose the Right Clay Body for Your Project — Potclays (2025-10-30) potclays.co.uk · Accessed: 2026-10-19
- Hand Building Pottery – 4 Easy Techniques — The Pottery Wheel (2022-08-30) thepotterywheel.com · Accessed: 2026-10-19
- Pottery and ceramics — Asbestos and Silica Safety and Eradication Agency (Australia) asbestossafety.gov.au · Accessed: 2026-10-19
Related content
What Is Ceramics? An Introduction to Ceramic Art for Beginners
Ceramics is a time-honored art in which earth meets water, takes shape, and gains durability through controlled firing. Explore the essential concepts, production stages, and tips for beginners in this guide.
Read more
Ceramic Shaping Techniques: Hand-Building, Coiling, Slabs, and Wheel Throwing
The same clay can become entirely different pieces through different shaping methods. Explore hand-building, coiling, slab building, and wheel throwing, and learn when to choose each one.
Read more