How to Make a Wayuu Bag: Base, Motif, Body and Strap
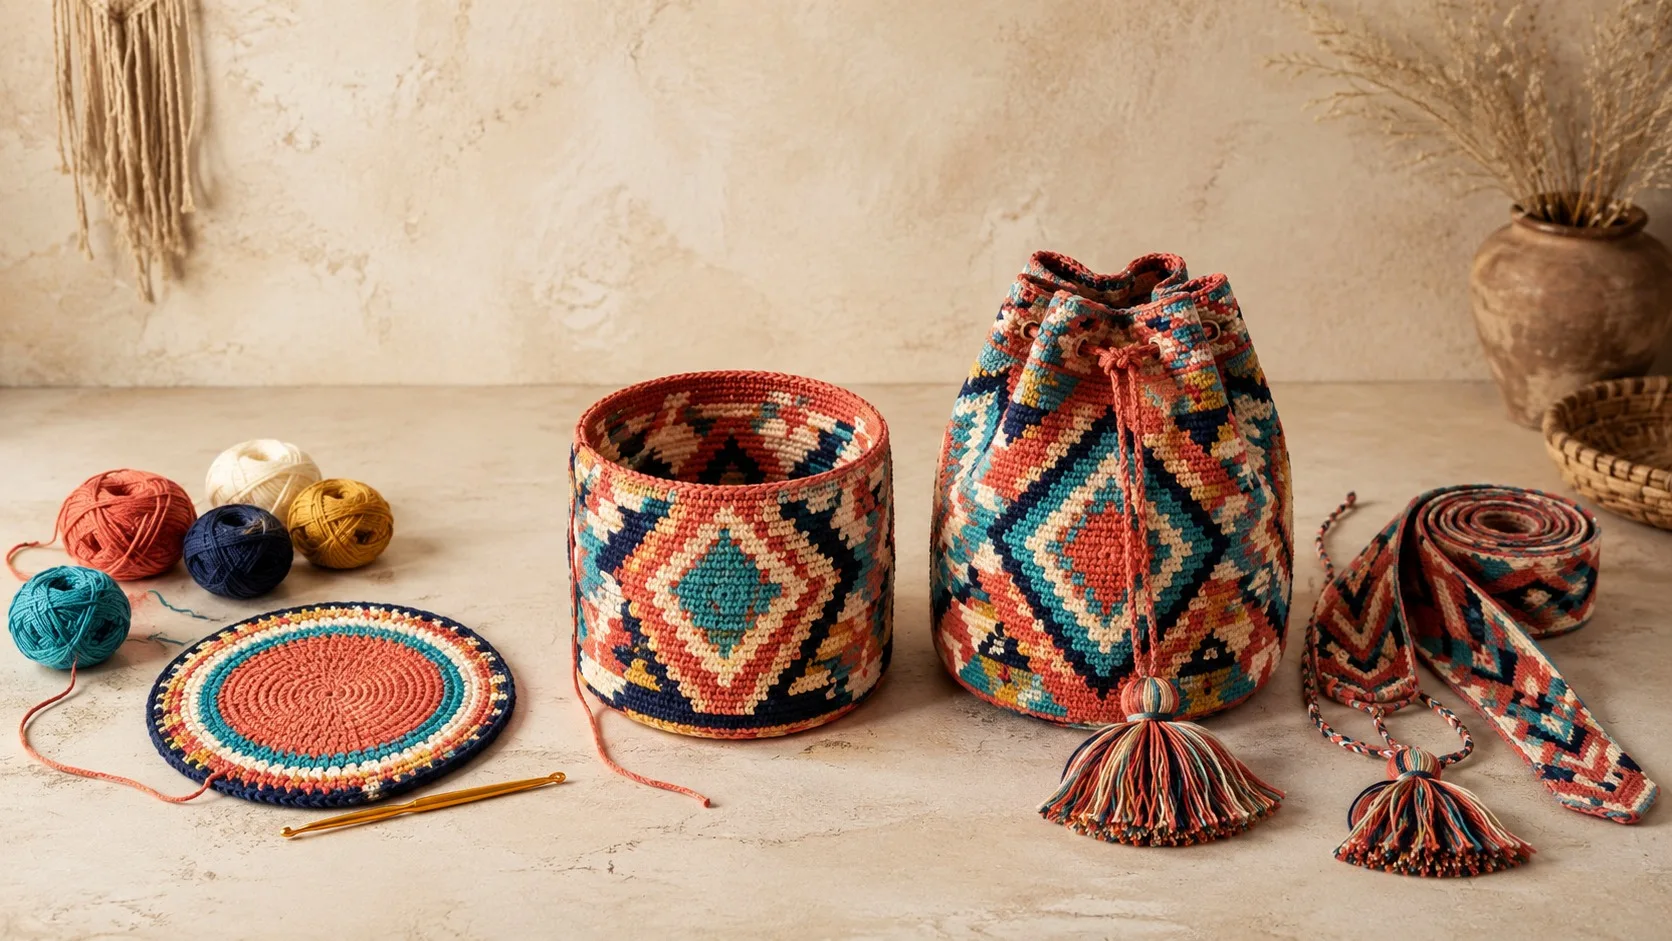
Making a bag with the Wayuu technique requires more than knowing how to crochet; it also calls for consistent stitches, careful color management, close motif tracking and patience. The bag usually consists of four main sections: a round base worked from the center, a patterned body rising upward, a drawstring closure and a long strap.
Rather than providing stitch counts for a specific pattern, this article is a beginner’s guide to the principles behind the process. For your first project, choosing a small, two-color design with a simple repeating pattern will make the process easier.
Essential materials
- Yarn suited to your chosen design
- A crochet hook suited to the yarn weight
- Stitch marker
- Scissors
- Yarn needle
- Motif chart or row plan
- Optional lining, zipper, magnetic closure or inner pocket materials
Before buying yarn, plan the bag’s dimensions and the number of colors you will use. Yarns from the same brand and range may offer more consistent results in thickness. As different dye lots can cause variations in shade, it is helpful to buy enough yarn from the outset.
1. Prepare your motif and color plan
Instead of starting a complex pattern straight away, plan it on graph paper or with a digital chart. Each square can be considered one stitch; however, because a round surface includes increases, the pattern must be adapted to the chosen design.
Two-color zigzags, diamonds or regular stripes are more manageable for beginners. Consider not only how beautiful the colors look together, but also the contrast between light and dark shades.
2. Crochet the round base
The bag usually begins at the center with a magic ring or a small chain loop. To keep the circular shape flat, increases are made at regular intervals in each round. Too few increases will make the base curve into a bowl, while too many will cause it to ripple.
Marking the starting point of each round with a stitch marker helps reduce counting errors. Once the base reaches the desired diameter, the increase pattern is adjusted for the transition to the body.
3. Build up the body
In the body section, increases are reduced or stopped completely. This allows the crochet work to rise upward into a cylindrical shape. Keeping the stitch tension consistent from one row to the next prevents the bag from twisting to one side or changing width.
When using multiple colors, unused yarns can be carried within the crochet work. This method reduces long floats on the inside during color changes and can create a neater inner surface. However, carrying too many strands at once may make the body unnecessarily stiff and heavy.
4. Follow the motif carefully
In patterned Wayuu crochet, you need to track not only the current row but also where the pattern repeat begins and ends. At the end of each round, check whether the motif has shifted. If you notice a mistake, unraveling the relevant section and crocheting it again will usually give a neater result than trying to correct it several rows later.
For longer projects, keeping brief notes of row counts and colors used makes it easier to continue from the correct point after a break.
5. Complete the opening and drawstring
Once the body reaches the desired height, the top edge can be reinforced with a few even rows. Depending on the design, chain spaces can be created for the drawstring. A separately made cord is then threaded through these spaces, and tassels may be added to the ends.
If you plan to add a lining or zipper, carefully measure the top edge at this stage. The lining should be wide enough not to stretch the crochet work, yet balanced enough not to gather inside.
6. Make and reinforce the strap
The strap can be woven, tightly crocheted, made as a cord or crafted with another handwork technique. Wider straps distribute weight more evenly across the shoulder. It is important to attach both ends of the strap to a broad area of the bag body using strong stitches.
Before using the finished bag, gradually add weight inside it to check the strap attachments, base and body.
Common beginner mistakes
- Stitches that are too tight or too loose for the yarn and hook
- Making irregular increases in the round base
- Pulling yarns too tightly during color changes
- Working several rows without checking the motif repeat
- Attaching the strap to only a few stitches
- Not considering the bag’s weight during actual use
Your first bag does not have to be perfect. Making a small sample base and motif swatch lets you assess the yarn, hook and color harmony before beginning a larger project.
Discover the handcrafted Wayuu technique up close
Exploring the color, motif and handle solutions used by different makers can inspire your own design. Rather than copying designs exactly, observing the technical approach and creating an original color and motif arrangement is more in keeping with the spirit of handcraftsmanship.
Discover products made with the Wayuu technique.
Frequently asked questions
Is making a Wayuu bag difficult?
Those familiar with basic crochet can begin with a simple design using only a few colors. The level of difficulty increases with the complexity of the motif, number of colors, size and strap technique.
What yarn is used for a Wayuu bag?
Cotton, cotton-blend or synthetic yarns can be used. The yarn’s stretch, weight, colorfastness and care requirements should be considered according to the bag’s intended use.
How many days does it take to make a Wayuu bag?
The time required depends on the bag’s size, motif, stitch density and the maker’s working pace. A handcrafted design with a complex pattern requires focused, careful work.